Inspirations
SEWING TUTORIAL:
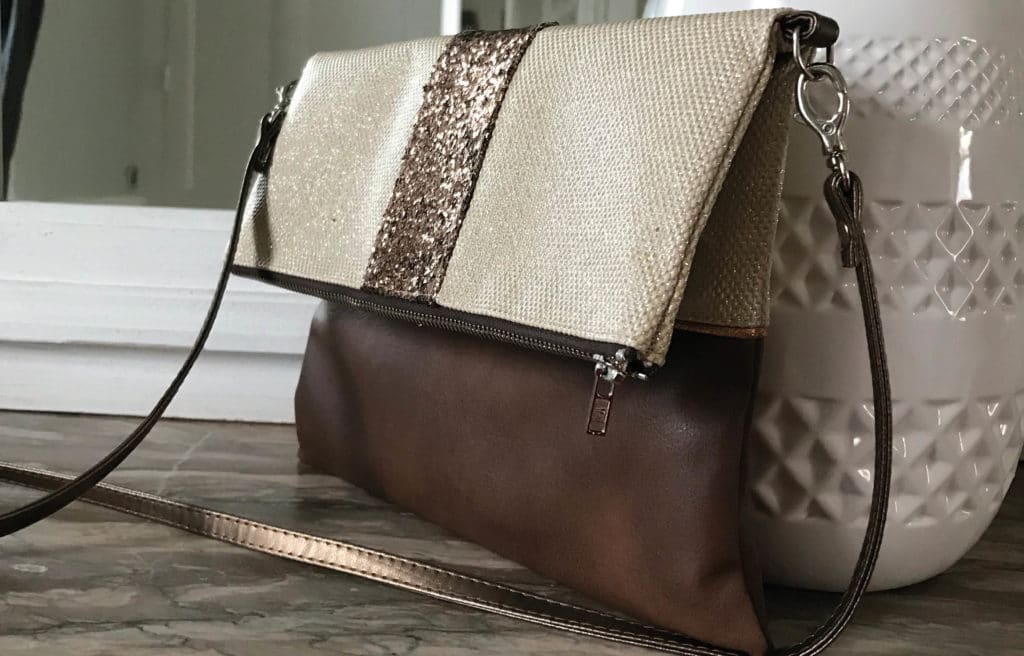
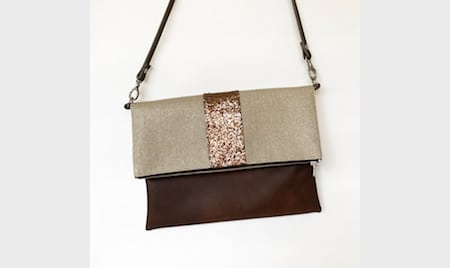
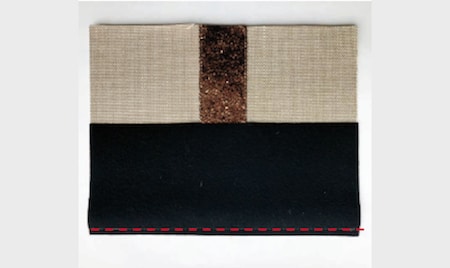
“Shoulder-Clutch Bag”
![]() MATERIALS
MATERIALS
- Fabric 1 (Glitter large bronze sequins) = H 8 5/8” × L 5 1/2”
- Fabric 2 (Beige synthetic Swarovski) = H 8 5/8” × L 19 5/8”
- Fabric 3 (Synthetic leather chestnut color) = H 4 3/4” °— L 22”
- Fabric 4 (lining) = H 12 1/2” °— L 22”
- Lightweight fusible woven interfacing= H 12 1/2” °— L 22”
- Piping cord (bronze lurex) = 22”
- 1 metal zipper 9 or 10 inch*
- Faux bronze strap of width 3/8” = 4” (small shoulder straps)
- Faux bronze strap of width 3/8” = 1 1/2 yds (shoulder strap for a person of ( of 5 1/2 feet in height.)
- 2- 1/2” or 5/8” Swivel hooks to match metal zipper
- 2 – 3/8” or 1/2” D rings to match metal zipper
- 2 metal rivets
- Matching thread(s)
![]() MACHINES
MACHINES
- elna electronic sewing machine
- In this tutorial we have used the elna eXperience 560.
- Size: H 7 1/2” – 11 3/4” °— L 10 1/4”
- A 3/8” seam allowance is used unless otherwise stated
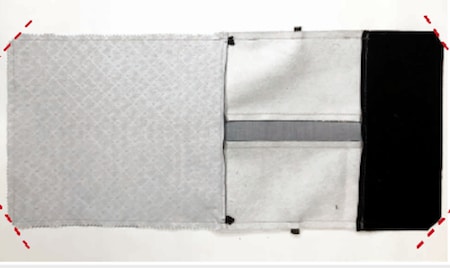
![]() CUT OUT
CUT OUT
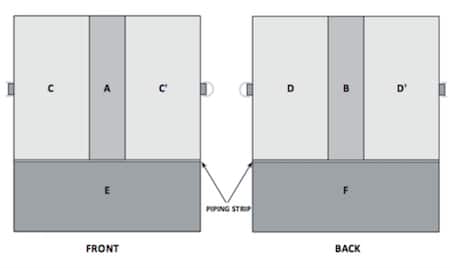
TAKE FABRIC 1 AND CUT:
- 1 front section A of H 8 5/8” °— L 2 3/4”;
- 1 back section B of H 8 5/8” °— L 2 3/4”.
TAKE FABRIC 2 AND CUT:
- 2 front sections C and C ’ of H 8 5/8” °— L 5”;
- 2 back sections D and D’ of H 8 5/8” °— L 5”.
TAKE FABRIC 3 AND CUT:
- front section E of H 5” °— L 11”;
- 1 back section F of H 5” °— L 11”.
TAKE FABRIC 4 AND CUT:
- 1 front section G of H 12 5/8” °— L 11”;
- 1 back section H of H 12 5/8” °— L 11”.
TAKE THE LINING AND CUT:
• 1 front section I of H 12 5/8” °— L 11”;
• 1 back section J of H 12 5/8” °— L 11”.
TAKE THE PIPING CORD, AND CUT:
• 3/4” °— 11” strips
![]() INSTRUCTIONS
INSTRUCTIONS
a. The Interlining
1. Fuse each piece of the interfacing on the back of the corresponding piece of lining:
• I over G: this piece will be known as section K for the rest of the tutorial;
• J over H: this piece will be known as section L for the rest of the tutorial.
b.Creation of front and back

1. A Gather the long left side of section C’ to the long right side of section A, right sides together and edge to edge, then stitch 3/8” from the edge.

3. Gather the long left side of section A to the long right side of section C, right sides together and edge to edge, then stitch 3/8” from the edge.
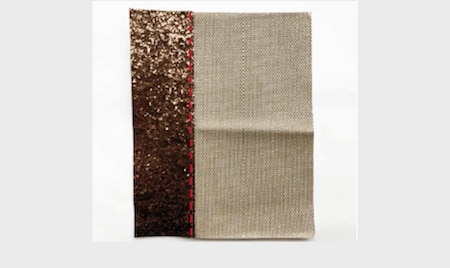
2. Lay the seam allowances onto the back of section A and topstitch right side up.
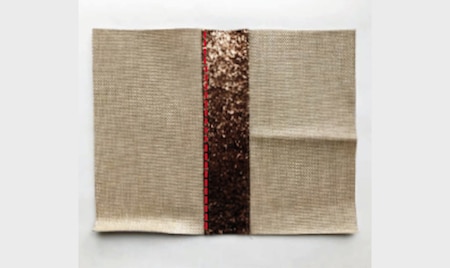
4. Lay the seam allowances onto the back of section A and topstitch right side up.
For the next step, the assembled part will be known as section M.
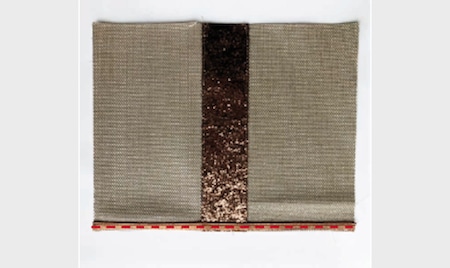
5. Join a piping strip right side up from the lower edge of section M, rib of piping cord facing inward, so that the piping seam is 3/8” from the lower edge of section M. Rib stitch (and therefore 3/8” from the edge).
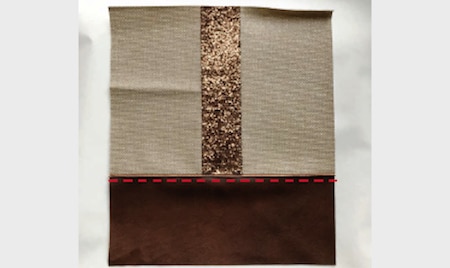
7. Lay the seam allowances on the outside of section M or E as desired, then topstitch ¾” from the piping cord right side up.
6. Join the upper edge of section E to the lower edge of section M, right sides together and edge to edge, then stitch 3/8” from the edge.
You have just created the front outside part.
8. To make the back outside part, you will have to repeat all the previous steps with sections B, D, D’, F and the second piping strip. Simply replace C by D, C’ by D’, A by B and E by F.
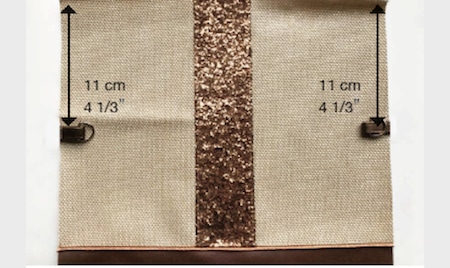
c. Assembly of small fasteners
1. Divide your 4” synthetic leather strap in 2.
2. Fold these in 2 by inserting a D-ring in each.
3. Place them on the outside front sides, folds and loops.
4. Create several front / back stitches to fasten them.
d. Installing zipper
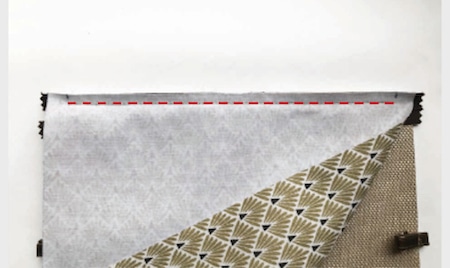
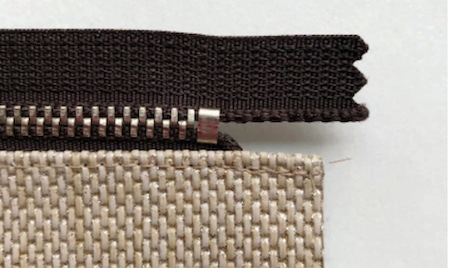
1. Place the zip on the upper edge of the outside front, right sides together, and overlap the inside front K. The 2 pieces are therefore joined right sides together and the zip is sandwiched between the 2. Stitch the 3 thicknesses together, about ¼” from the zipper’s metal teeth, starting and ending the seam at the slider level (i.e. 1/8” from the ends).
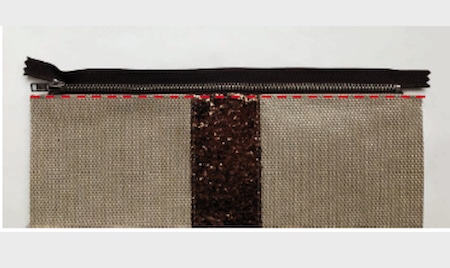
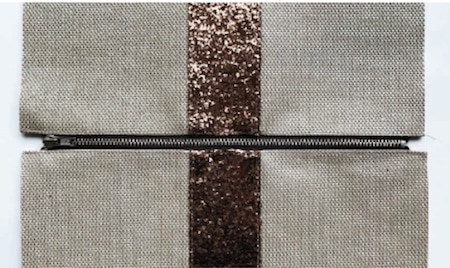
2. Fold the 2 pieces wrong sides together. For perfect corners, tuck the unsewn zip ends between the 2 fronts. Topstitch the 2 fronts with the upper edges over the entire length. *If your zipper is longer than the bag width, you may have to trim off the bottom of the zipper and hand-sew the bottom closed until it is sewn in place within the seam.
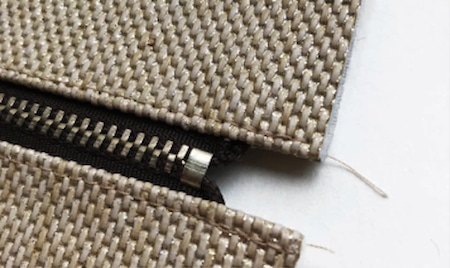
3. Do the same with the outside back, inside back and the other zipper length. Keep this tip for perfect corners in mind!
e. Bag assembly
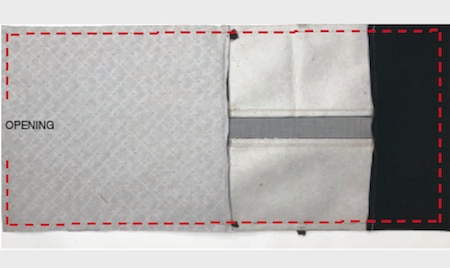
1. Open the zipper up to its half point, at least. Place the outer front and back right sides together, then the inside front and back right sides together. Be sure to perfectly match the seams of the zipper. Stitch the pieces continuously all around, 3/8” from the edges, leaving a 10 cm opening in the lining to turn the bag over.
2. Notch or oversew the seam allowances of the lining to prevent the fabric from unraveling and strip the corners 5/8” from the seam. You can now turn your bag right side up via the opening in the lining then close the latter with some invisible stitches by hand.
f. The shoulder strap
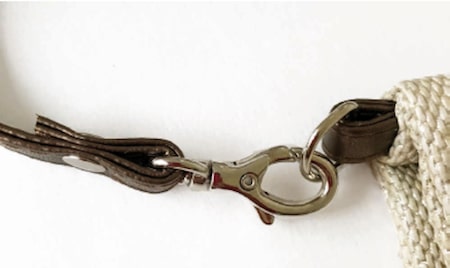
String 1” from the ends of the 1 ½ yds. imitation strap in the ring of each swivel hook and rivet with the 2 rivets. All you have to do is fasten the snap hooks to the D-ring loops.
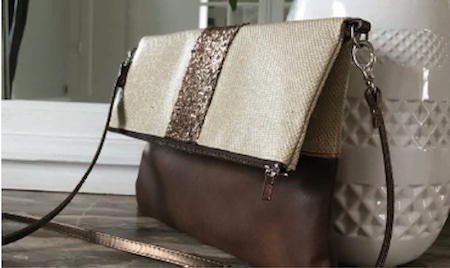
Congratulations you have just completed your bag!
This tutorial is brought to you by designer and fashion blogger Jane Emilie, in partnership with Elna. A stylish three-piece clutch sewn entirely with the Elna eXperience 520S.
© Elna International Corp. SA, all rights reserved
Copyright
The authorization to use this documentation is hereby granted exclusively for non-commercial use. The contents of this documentation are the sole property of Elna International Corp. SA. This documentation shall not in any way constitute a right to transfer any rights with respect to copyrights of Elna International Corp. SA to the user or to third parties.